Tuesday, April 28, 2009
The Cradle Project
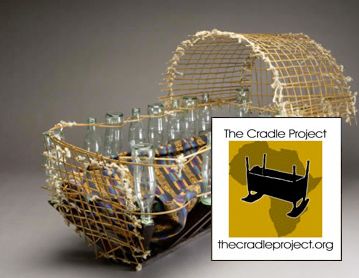
The Cradle Project (www.thecradleproject.org) was an initiative designed to recognize the estimated 48 million orphaned children in sub-Saharan Africa. Project founders challenged the 555 participating artists from around the globe to create a cradle out of recycled materials. The response helped not only in gaining widespread awareness, but also raised over $90,000 to feed, house, and educate the orphans.
"We believe that if we can see enough potential in a piece of scrap to make a structure which cradles a child, why can we not see that much potential in our world’s forgotten children. Empty cradles speak for themselves. Juxtaposed to these cradles will be a wall of slowly falling sand, symbolizing how these lives, these cradles, this potential, will all be buried and never realized."
Thursday, April 23, 2009
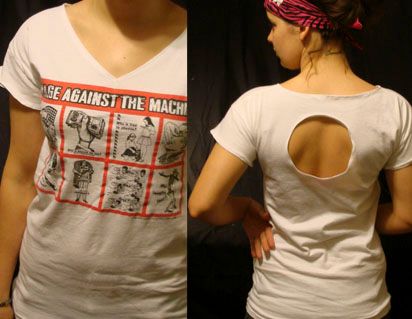
V-neck/Keyhole Shirt Tutorial
My first tutorial! I will be showing you how to make this shirt out of an ugly, boxy mess of a t-shirt. I hope that this video can be useful to many DIYers in the blogosphere. Feel free to share this tutorial - I only ask that you link back to my blog, and post your results in the comments!
Stay tuned for a PDF download of this tutorial.
Tuesday, April 21, 2009
INKAHOOTS!
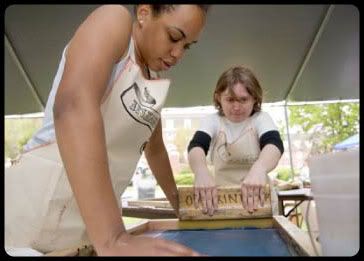
Inkahoots! is a collaborative four-day artmaking project in Athens, Ohio between Ohio University School of Art Students, visiting artist Clinton Reno, Athens High School, and other visiting students. Recently, graphic novelists Joshua Dysart, Ron Wimberly, Dan Goldman and Pornsak Pichetshote have also been added to our line-up of guests.
On the Friday and Saturday of Mom's Weekend, unique handmade apparel will be printed and sold at the Howard Hall site, at the top of Jefferson Hill. Stop by our custom tent to customize clothing with the images and color of your liking! The sales tent will also feature pre-made clothing and prints by Clinton Reno and members of the OU Print Guild. View Clinton's website at http://clintonreno.com/
Friday, May 1st from Noon - 5 pm
Saturday, May 2nd from 10 am - 3 pm
Additional Events Include:
Clinton Reno Exhibition
Wed., April 29th - Sun., May 3rd
Cube 4 Gallery, Seigfred Hall
Comic Book Bootcamp Lecture
presented by The @ Lab
Wednesday, April 29th
5pm - 7pm
Baker Center Theater
2nd Floor
Clinton Reno Lecture
Thurs., April 30th at 3 pm
401 Seigfred Hall
The School Of Art Prom: "Come as a piece of art"
Saturday May 2nd 8pm-12am
Seigfred Hall Lobby
Costume required- $3 to $5 at the door.
DJ, Cash bar, Refreshments, Photo booth and Costume contest!
I can't wait to experience the turn out for this event - everyone we have been collaborating with is very excited about the weekend we have planned. It should be a fantastically hectic weekend with great friends!
Tuesday, April 14, 2009
Response to "Revolution is Handmade"
Knitting circles are a fantastically kitschy way to network. I invite readers who have a similar interest in this sense community to start a project similar to the one I posted yesterday. Find a common activity between friends and use it to form connections, whether you start a reading circle, take turns cooking, or simply post your own knitting project to this forum! Whatever you decide to do, send me your results!
Monday, April 13, 2009
Revolution is Handmade
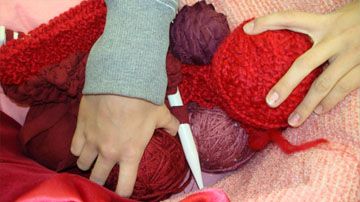
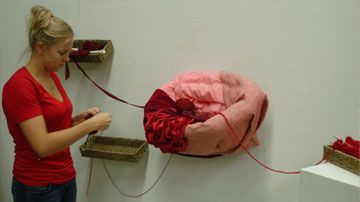
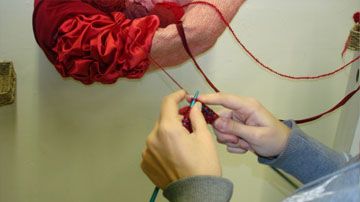
As I am putting together some instructional DIY videos, I would like to share some of my own work. The following pictures are documentation of a project I did this fall. The womb-like knitting basket provides a nurturing forum to bring women together and discuss social and political activism.
The craft of knitting and yarn-work has been an integral part of women's interaction for centuries. In times when women had no voice in social and political matters, knitting circles have served as a traditional space for storytelling, discussion, exchange, and protest. The purpose of this piece is to inspire a community of people to work together and create in a collaborative manner. Women can rise up and embrace their crafty skills, using them to be proactive about societal change.
Tuesday, April 7, 2009
Stop Animation with Digital Cameras
Today, I would like to share a tutorial for making a quick and easy
animation. You will need a digital camera, and access to QuickTime
Player. To download QuickTime, visit:
http://www.apple.com/quicktime/download.
1. Set up your "studio". It is important to take all of your photographs
on a consistent background, so think about laying down a table cloth
or setting up on a rug of some sort. I set up my camera using a tripod,
so I didn't have to worry about my animation being TOO jumpy.
2. Start taking pictures! Move your object/s slightly, take a picture,
and repeat, repeat, repeat. It is important to take a lot of pictures. In
my animation, I used about 120-140 pictures, resulting in a 20 second
video.
3. Upload your photos. Do not change the file names after uploading!
This is very important, as a change in the name can change the order
of your pictures. Make sure your pictures are in a folder of their own.
4. Open QuickTime Player. Under the File menu, click Open Image
Sequence. Find the folder of your pictures on your hard drive, and
select the first photo. Click Open.
5. The Image Sequence Setting box will pop up, where you will specify
the frame rate. For an animation, anywhere between 10 and 15 frames
per second works well.
6. When you have a frame rate you are happy with, use the File menu
to Save As.
Monday, April 6, 2009
Cat Lady Press Opening
Welcome to Cat Lady Press! The goal of this blog is to create interaction between "craftivists" from various physical locations and personal backgrounds. I will be frequently posting projects, publications, and tutorials for all skill levels of those in the DIY (Do It Yourself) community. Audience participation is a vital element to this project; I strongly encourage readers to blog along with each other, sharing their results and providing constructive critique. Please check back in a few days for information on my first projects!
Subscribe to:
Posts (Atom)